| |
|
| |
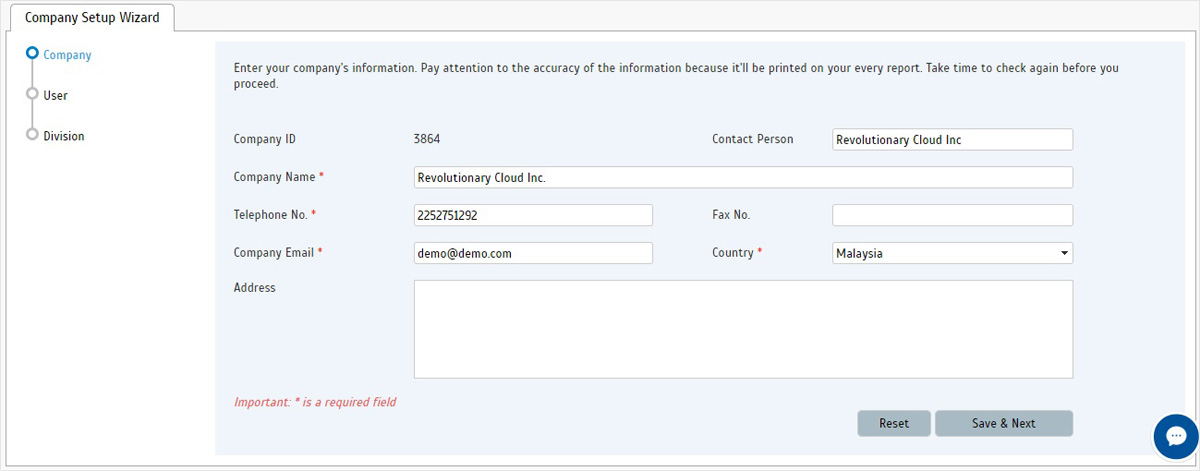
| 1. Company |
| • Enter Company's details, particularly the compulsory information and click 'Save & Next'. |
 |
| |
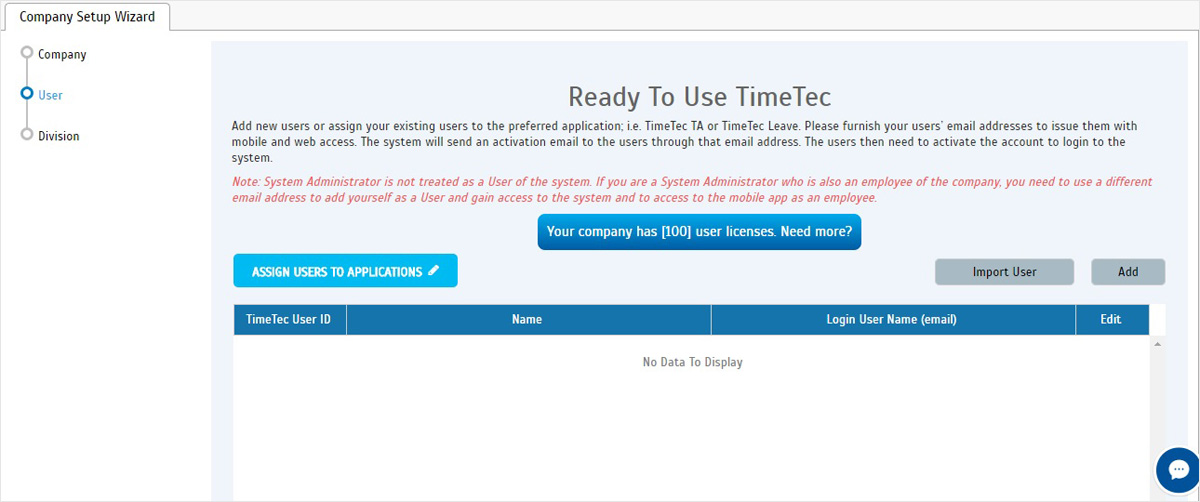
| 2. User |
Important: You need to add at least One (1) user (An account owner or a System Admin is not considered a TimeTec User) to properly try out the Leave application functions.
• Login User Name (email) added must not be the same as System Admin's email.
• There are 3 ways to add user into TimeTec Leave:
i. New TimeTec subscribers - Add
ii. New TimeTec subscriber - Import User
iii. Subscribers using another TimeTec solution - Assign Users to Application |
 |
| |
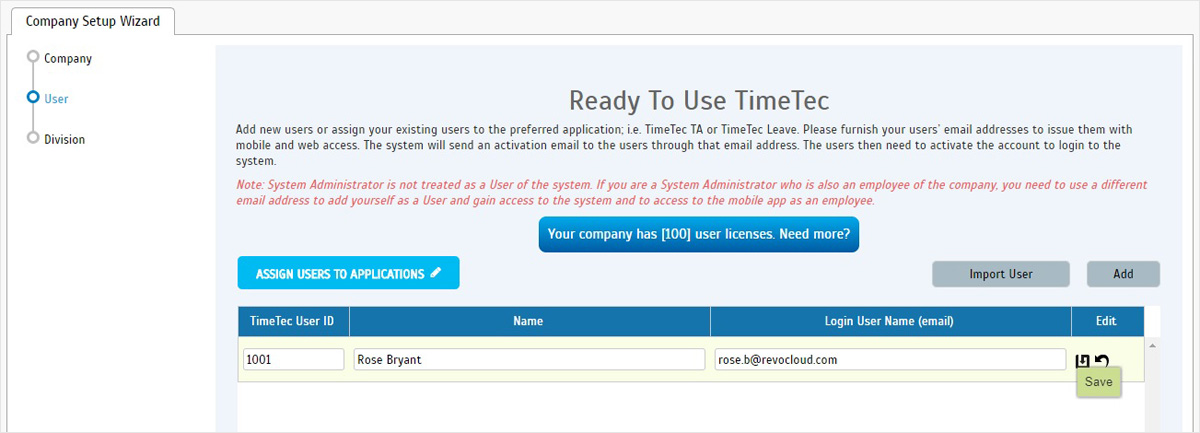
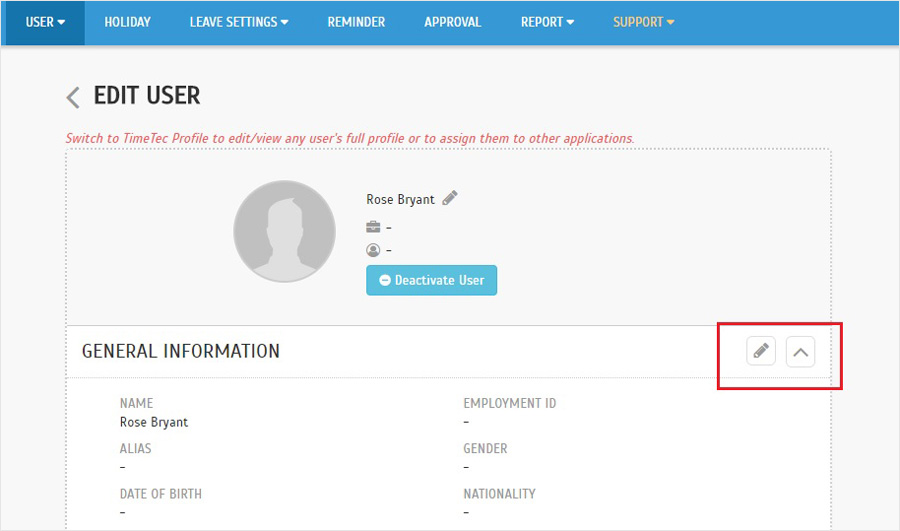
| i. Add User |
• Key in the three fields i.e TimeTec User ID, Name and email, and click Save to add.
• Please make sure that the e-mail address used is valid as the system will send activation e-mail to user automatically.
• Additional details of the user can be filled up at Manage User module later. |
 |
 |
 |
| |
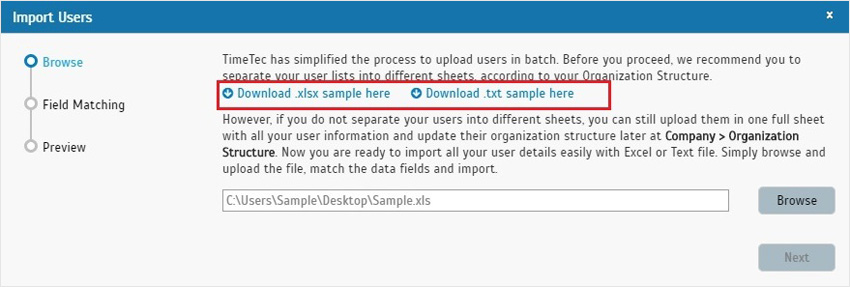
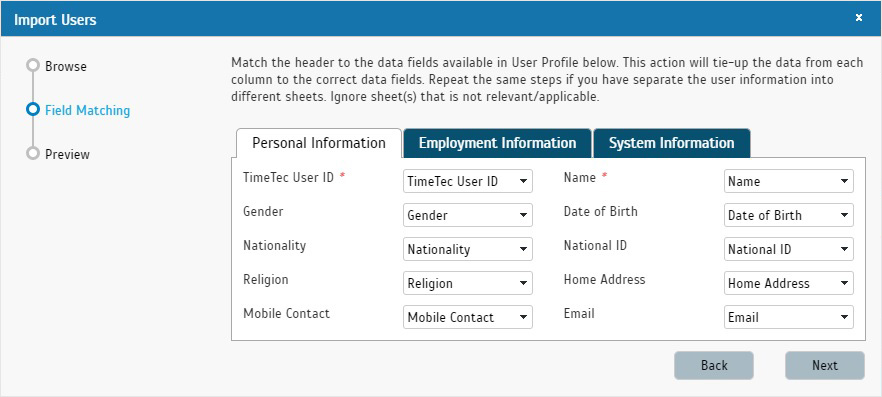
| ii. Import User |
• To add new users by batch. You can view the sample import files (in Excel or Text) that the system expects.
• Follow the same sequence and Import your file. |
 |
 |
 |
 |
| |
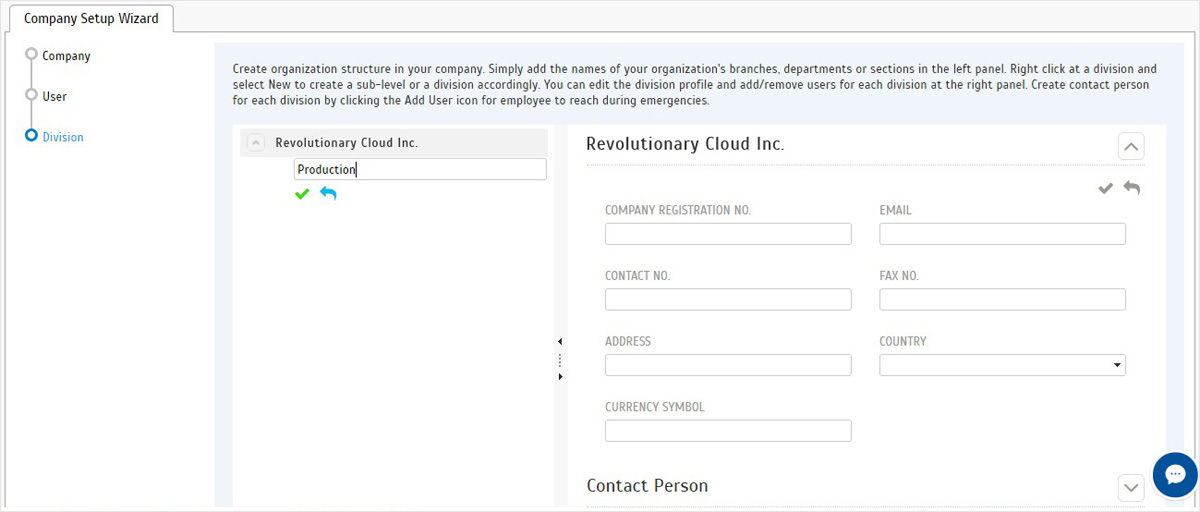
| 3. Division |
• You can choose to set up Division or Skip this step.
• Right Click at Company Name. |
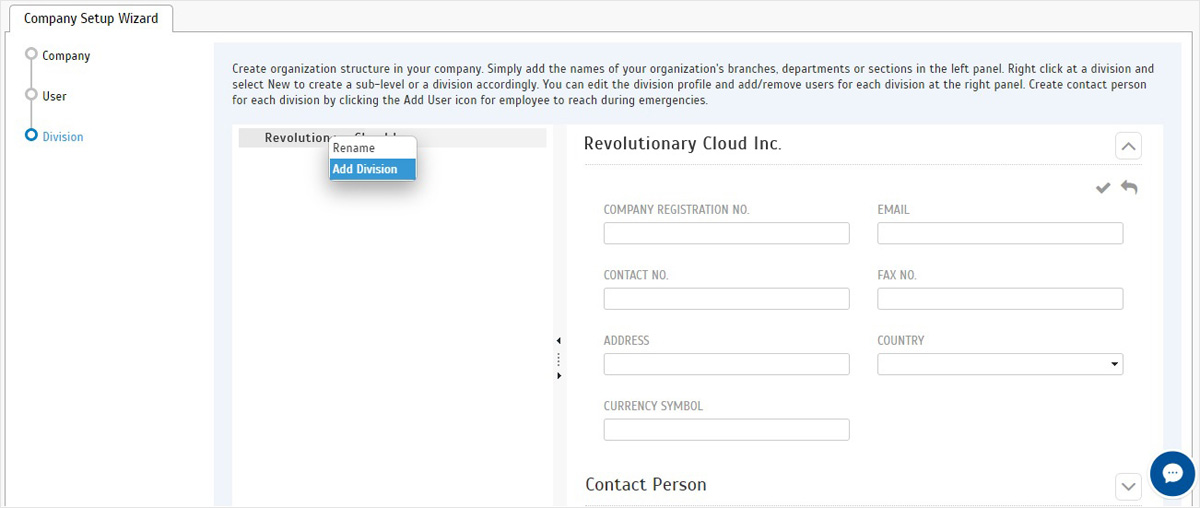 |
| • Add Division & Save. |
 |
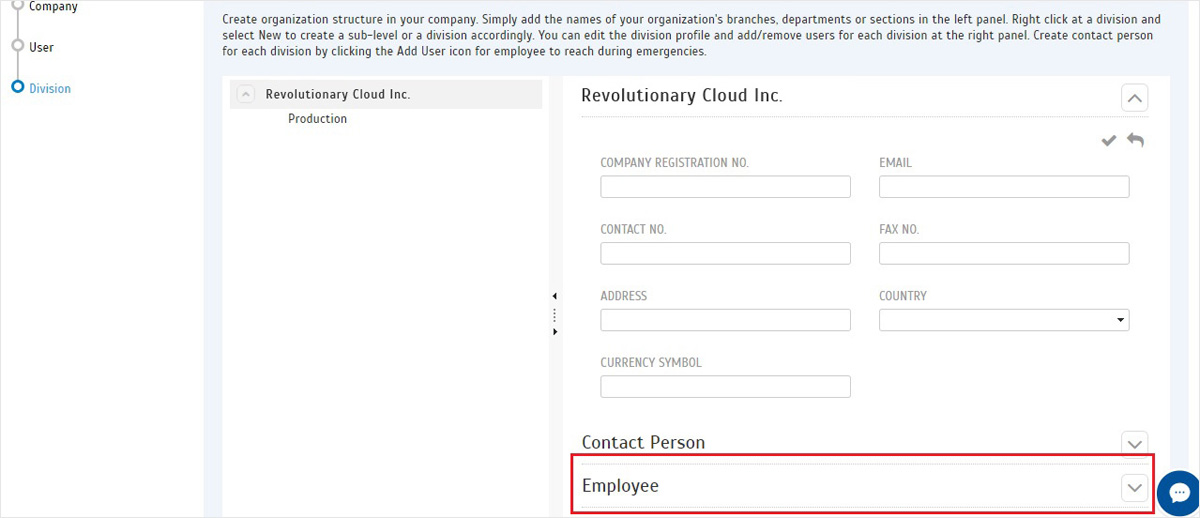
• On right panel, click to expand 'Employee' section.
• Assign user. |
 |
|
|
|
| |
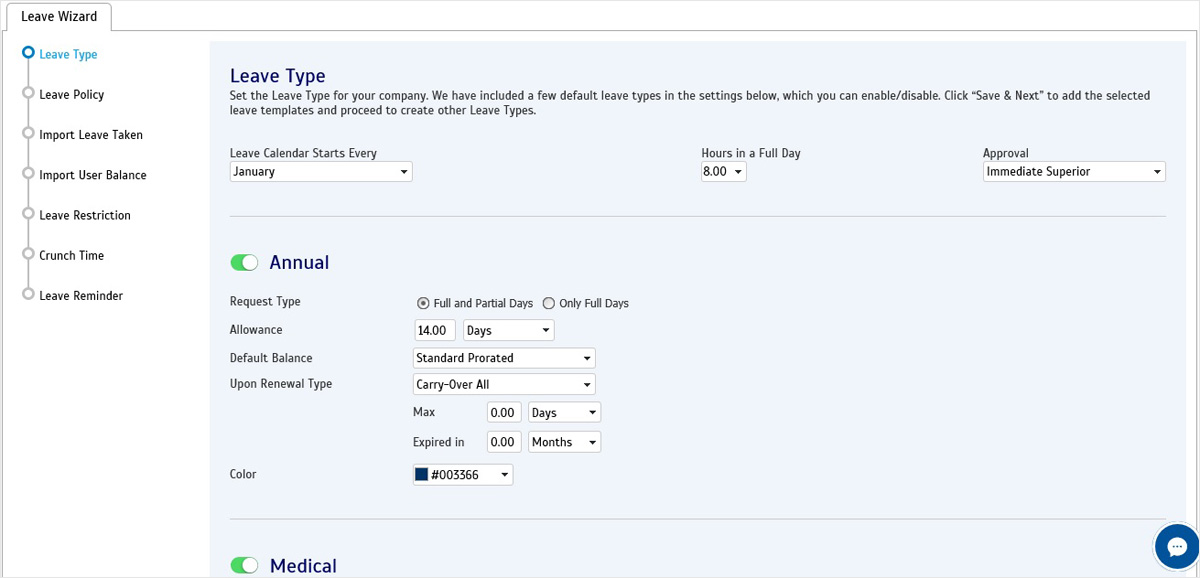
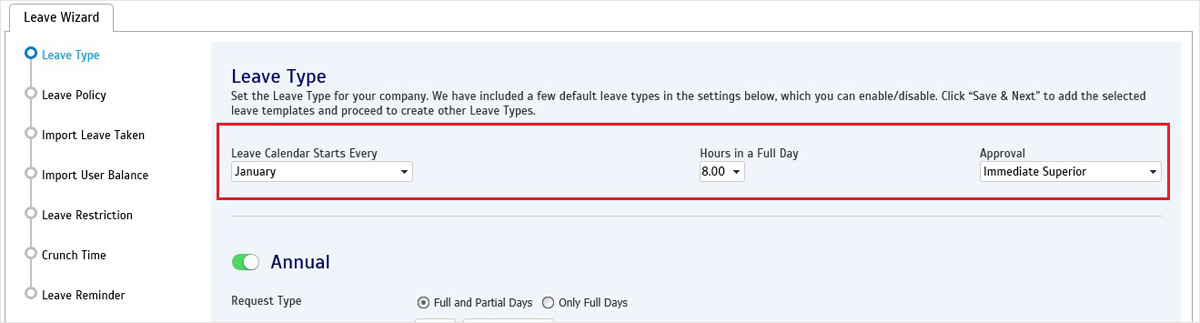
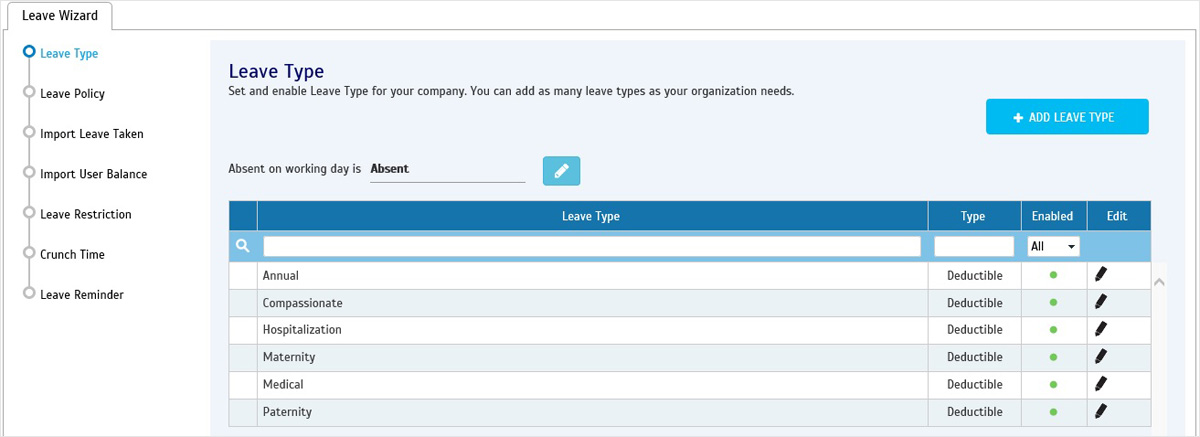
| 1. Leave Type |
| • The leave type module will show you a screen that allows you to enable/disable a list of default leave types. After you have chosen the ones applicable to your company, click 'Save & Next'. |
 |
| • A few leave settings available here can be set for each individual user later at User > Manage User > Settings > Option/ Approval Method |
 |
• Once you click 'Save & Next', the following screen will be Leave Policy module. If you need to add other types of leave, return to Leave Type.
• There is now a table with your enabled leave types. You can choose to Edit or Add. |
 |
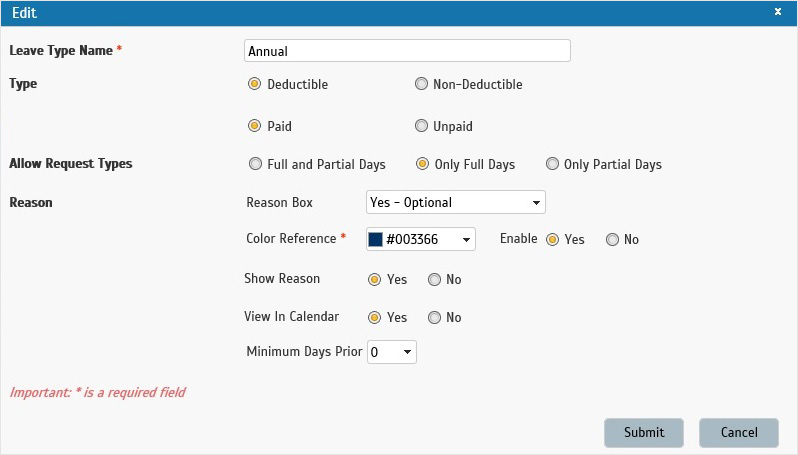
• In Edit, there are several settings:
i. Edit the Name
ii. Select whether Deductible/Paid
iii. Select whether to allow users apply for Full/Partial Days |
 |
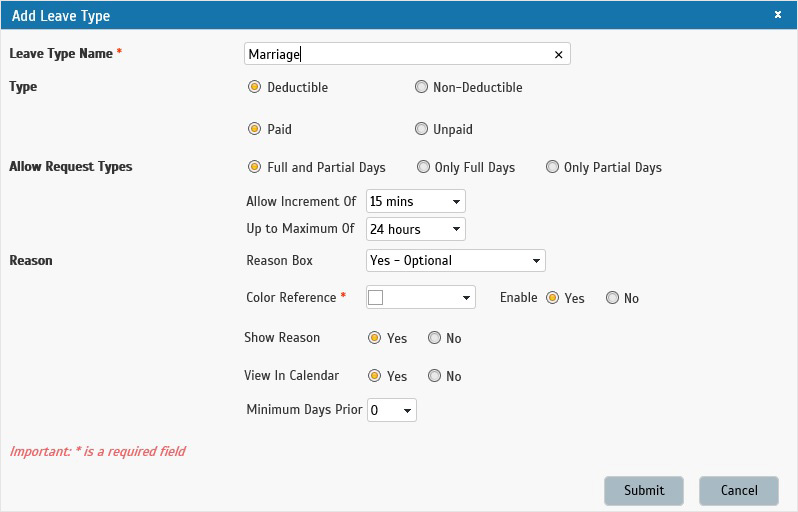
| • Add |
 |
| |
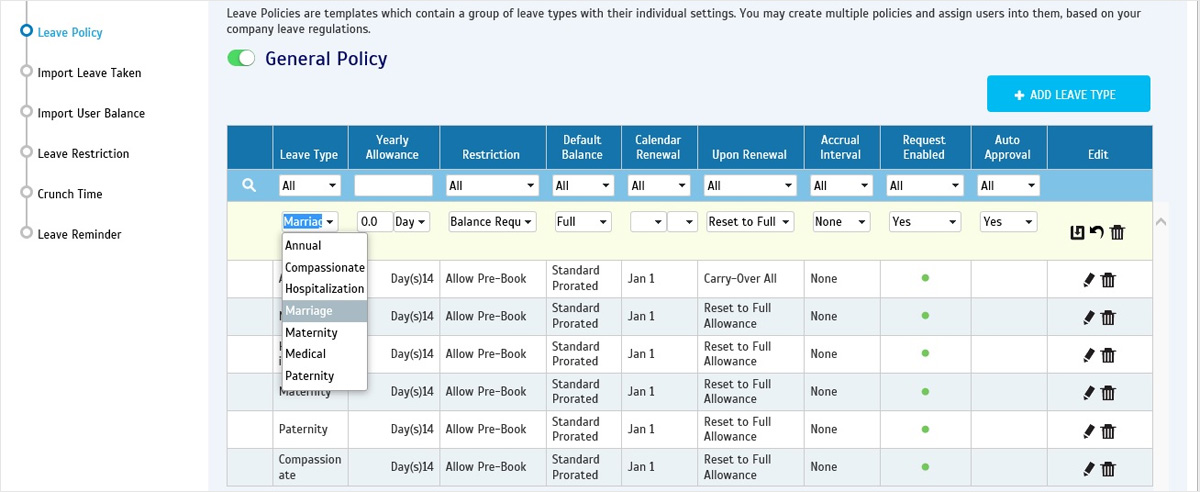
| 2. Leave Policy |
• Initially, the Wizard will provide you with a default Leave policy template called the General Policy which you can enable/disable. This policy comprises of default leave types from the previous module.
• Should you decide to use the General Policy, you need to check whether the settings in each field is appropriate and you need to Edit if necessary.
• While not all leaves are applicable equally among employees, e.g. Maternity/Paternity leaves, this can be customised (disable) later for individual users at User Leave Settings. |
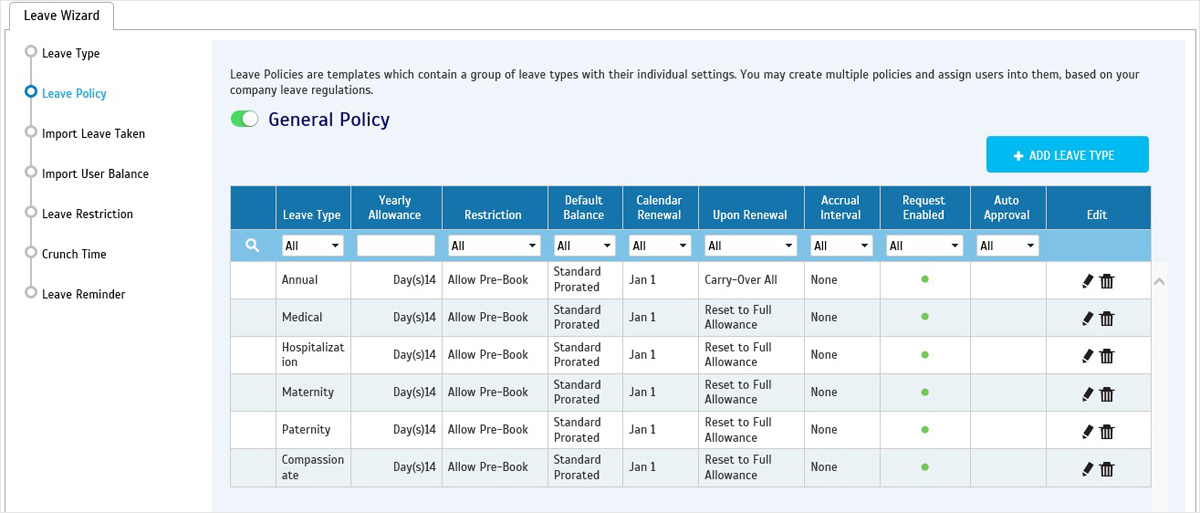 |
| • If you have created a new Leave type earlier, click 'Add Leave Type', go through each field and Update. |
 |
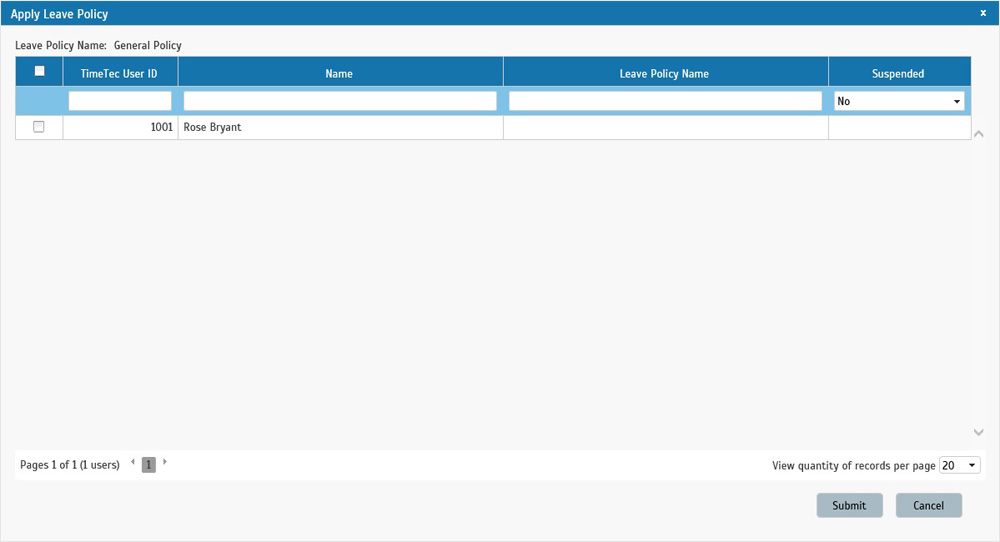
| • When ready, press 'Save and Next'. Assign users to this policy in the pop up window and Submit. |
 |
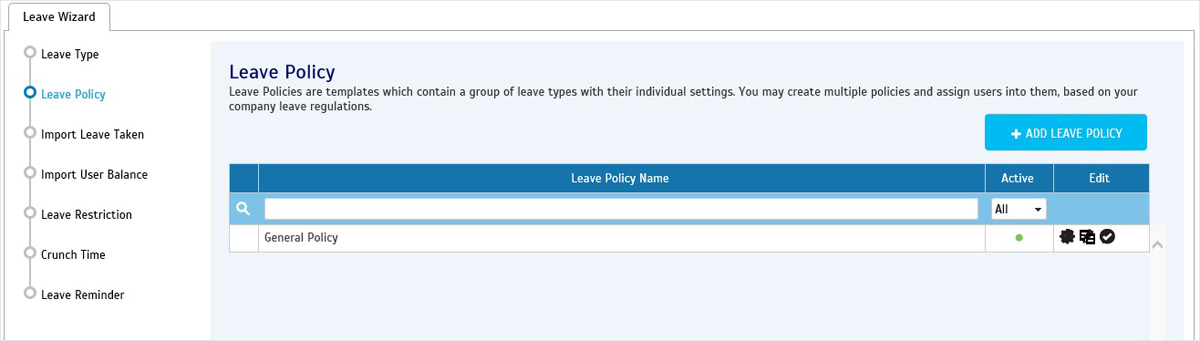
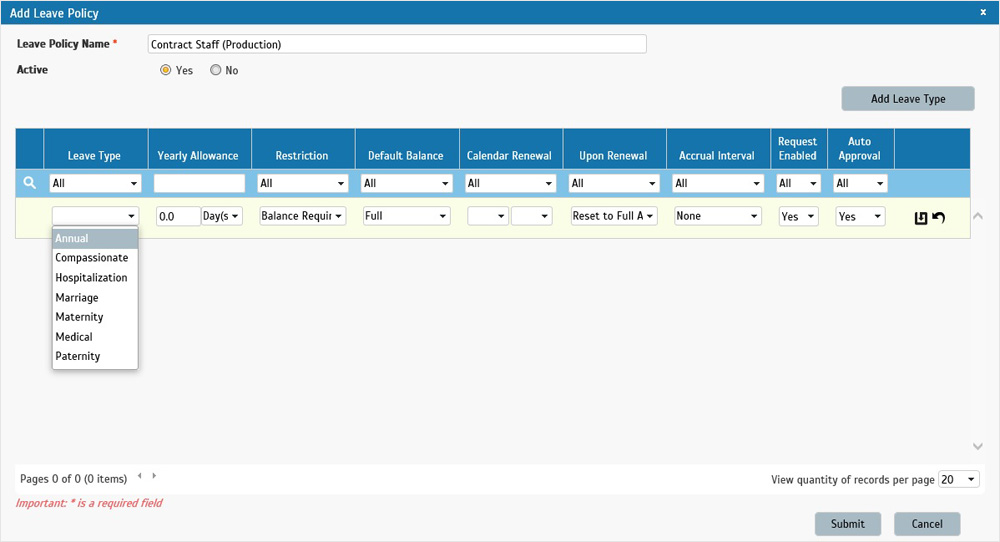
| • If the General Policy was not suitable for your company setup, or if you require additional policies, return to Leave Policy tab. Click the Add button. |
 |
| • Customise your own leave policy and assign to users. |
 |
| |
| NOTE: At this point, the system has been able to provide users with their leave allowances and users can start applying for leaves at any time. |
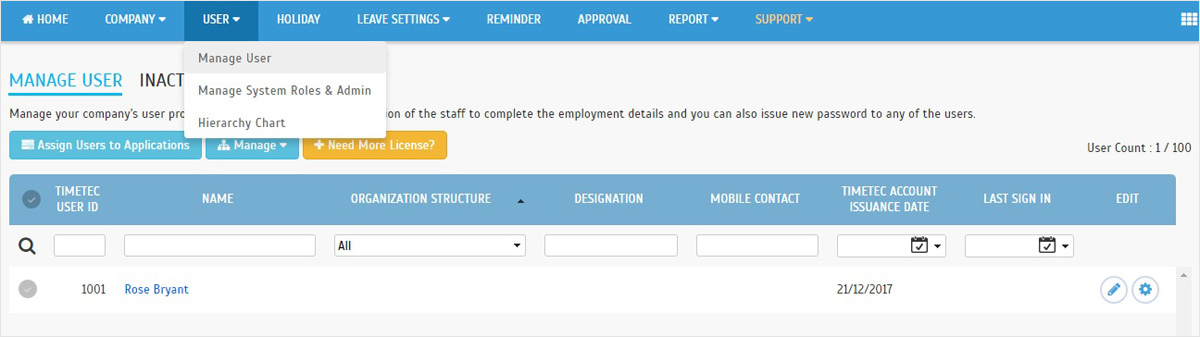
| • Go to User > Manage User > Settings to view the user's current leave balance. |
 |
| |
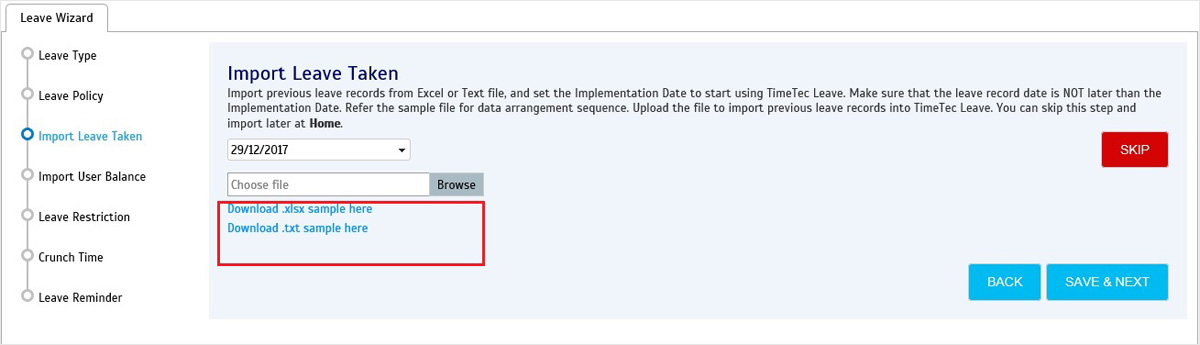
| 3. Import Leave Taken |
• Unless your company is newly setup, you would prefer to import records of leave taken. You can also skip this process if you don't require it.
• Please make sure that the dates in the record file is not later than your setup implementation date.
• You can view the sample import files (in Excel or Text) that the system expects.
• It's important that the leave names match and you can start with the Import process. |
 |
 |
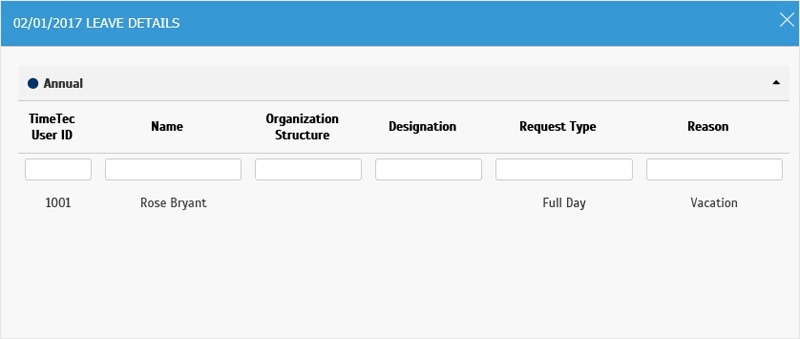
| • By now you should be able to view users' leave taken record in TimeTec. |
 |
 |
| |
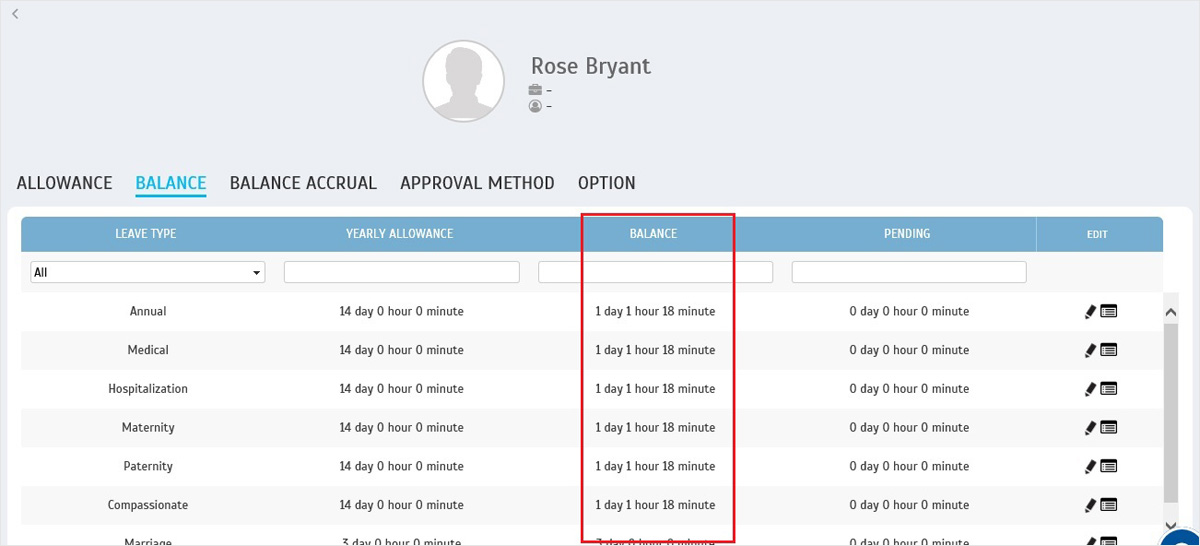
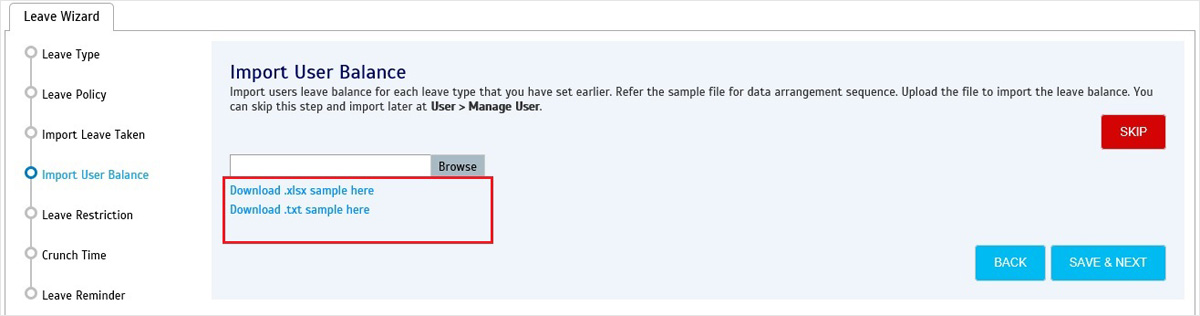
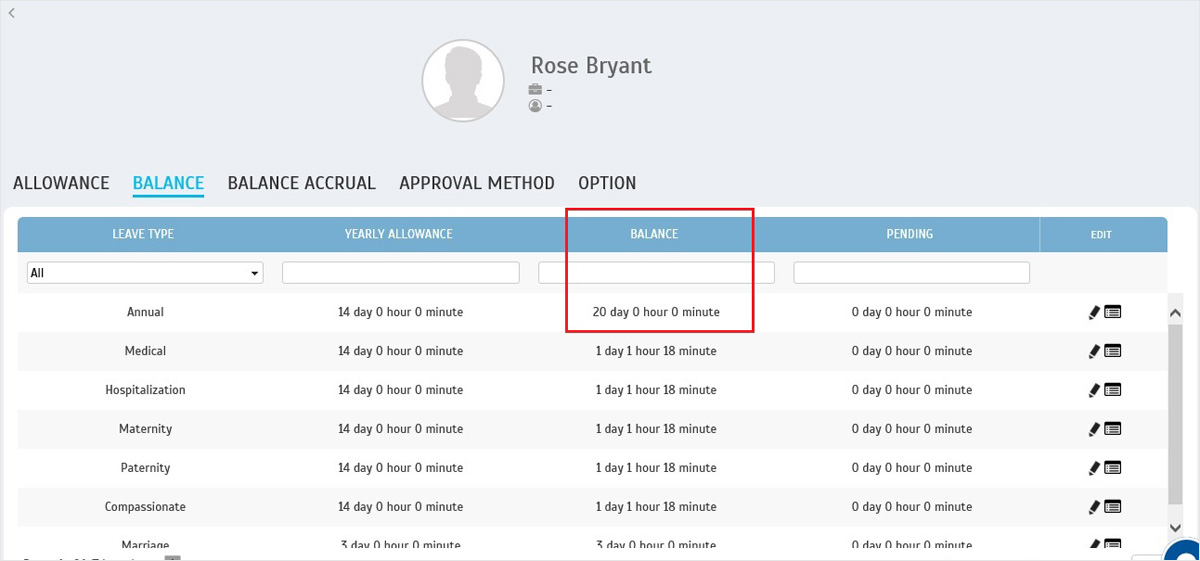
| 4. Import User Balance |
| • During the System Setup, the initial User leave balance at Implementation date can be established through several ways. One of it is by directly importing the latest balance into TimeTec Leave. |
 |
• ‘Balance’ column represents the latest total leave balance available for users (e.g. Carry Over + Current year Allowance – Leave taken to date).
• ‘Carry Over’ column does not affect the current available leaves. The number of carried over days is presented separately and is mainly displayed for additional information only. |
 |
 |
| |
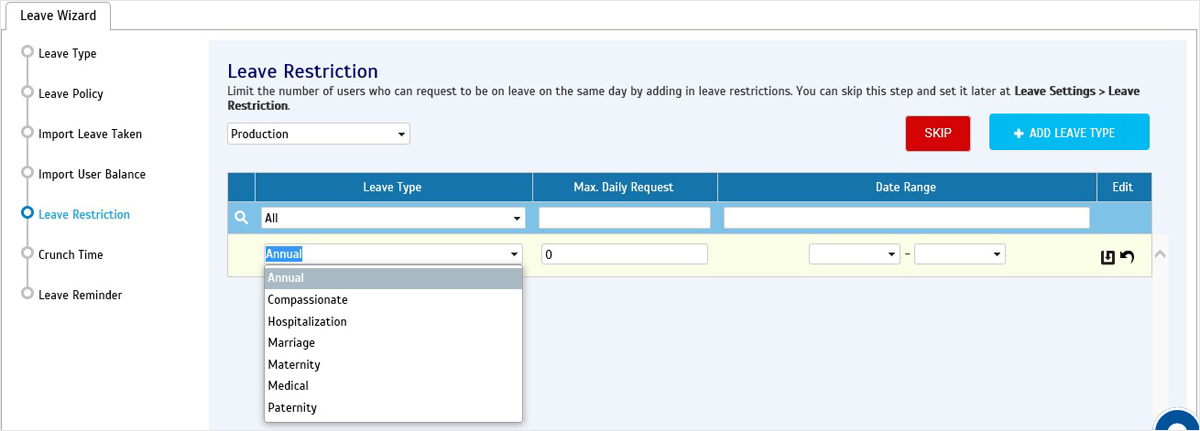
| 5. Leave Restriction |
• This is an OPTIONAL module.
• You can set restrictions for number of users taking leave on a certain day and you can limit the restrictions to specific Division(s) only.
• Click 'Add Leave Type' to define the rules. |
 |
 |
| |
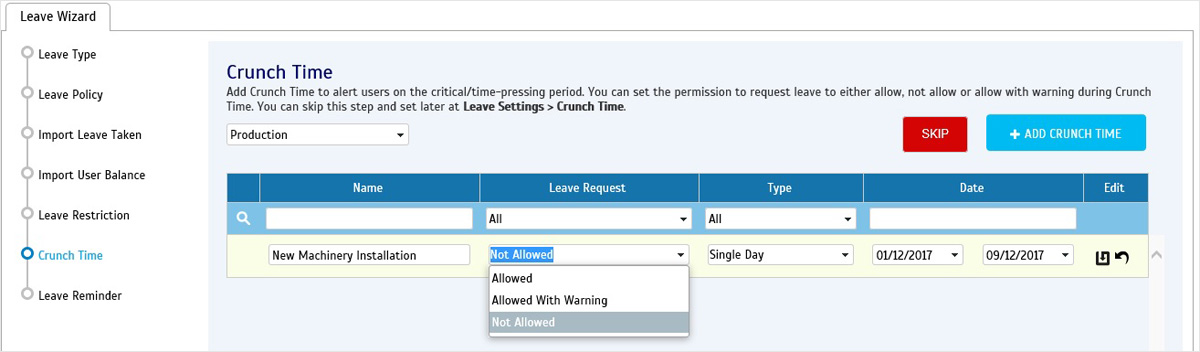
| 6. Crunch Time |
• This is an OPTIONAL feature.
• You may set a crunch time to block user's leave during critical period and it can be applied to specific Division(s) only.
• Click 'Add Crunch Time' to configure this restriction. |
 |
| |
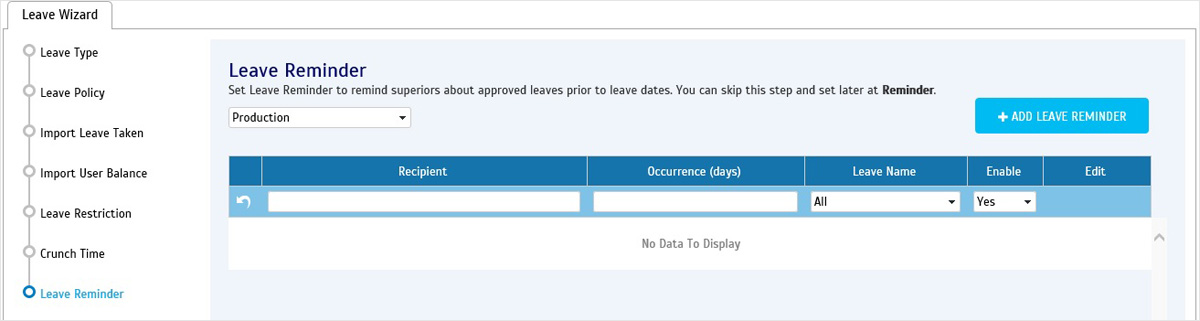
| 7. Leave Reminder |
• This is an OPTIONAL feature.
• You can set reminders to notify Admin or User about some upcoming leaves.
• Click 'Add Leave Reminder' and configure applicable leaves, recipients and frequency quantity of reminders (e.g. 5 days, 3 days and 1 day before leave date). |
 |
 |
| |
| 8. Click 'Finish' to complete the Wizard. |