 |
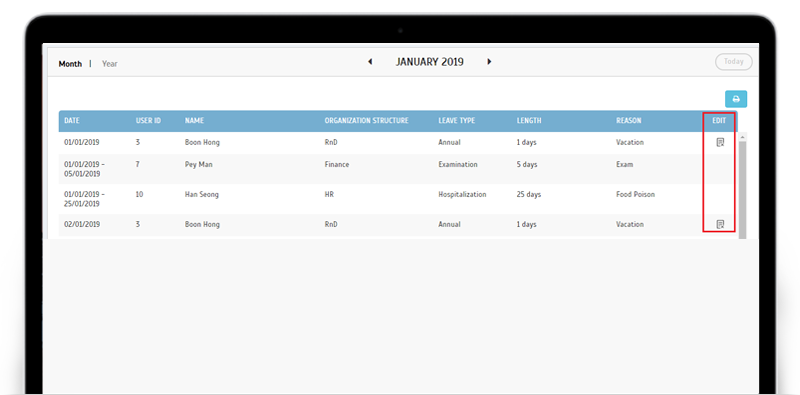
| User’s Leave Overview (List View) – Added Leave Cancellation icon |
| Generally, if you ever need to cancel your own leave (approved) through the web, you can head to the Leave Overview page and select filter for users as “Only Me”. Following that, clicking on the leave name inside the Calendar will bring up the leave cancellation request and you can proceed by submitting that form. Besides the default Calendar view, we also provide a List View that directly displays the leave details in a list format. In February, we’ve enhanced the List View by adding the Leave Cancellation button here. As such, you can now use either one of Calendar View/List View to request for a leave cancellation. Note: Request for leave cancellation can be carried out at Leave Overview only through the user’s own account. Cancellation can also be initiated by the Approver at the Approval page (Other Admins do not have the privilege to initiate cancellation). |
| Please refer to the sample screenshots below for further details: |
| a. User’s Leave Overview (List View) – Added Leave Cancellation icon |
 |
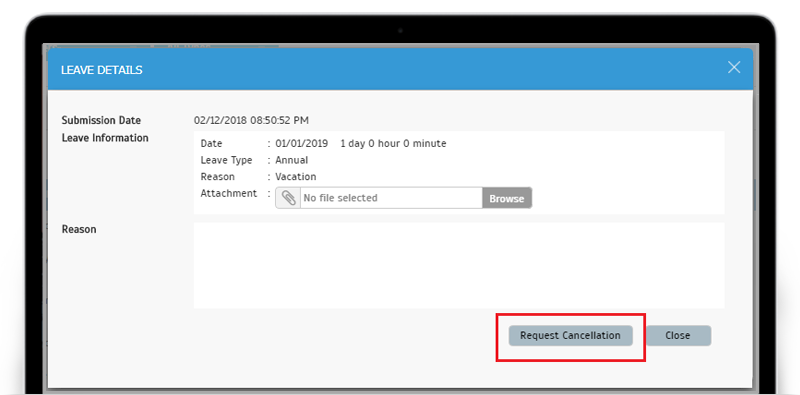
| b. Leave Cancellation Pop-Up Once the icon is clicked, the following pop-up will be displayed whereby users can request for cancellation. |
 |
| TimeTec Leave App Update |
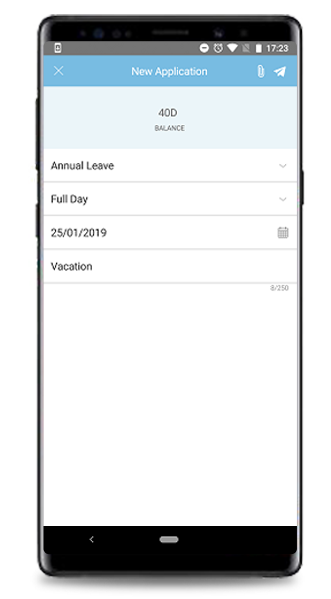
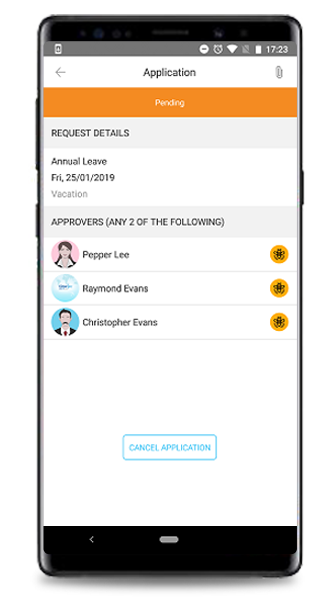
| 1. Approval |
| To provide more flexibility, we recently released a new Leave Approval method, known as ‘Any [X] Approvers’. With this setting, Admins will be allowed to select multiple approvers for a user's leave application but it is possible that not everyone chosen must respond to the application. What’s unique for this option is that you can specify the [X] number of approvers that are required to successfully approve the request. For instance, if you name 3 approvers, then set the condition as ‘Any [2] Approvers’, leave will be granted as long as any 2 out of the 3 individuals choose to agree. |
| a. User View New Leave Application |
  |
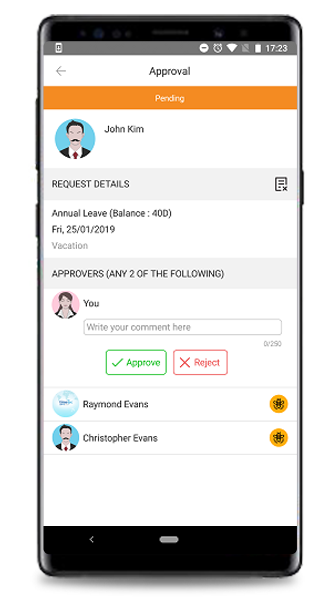
| b. Approver View |
| i. 1st Approver View (i.e. Pepper Lee) |
 |
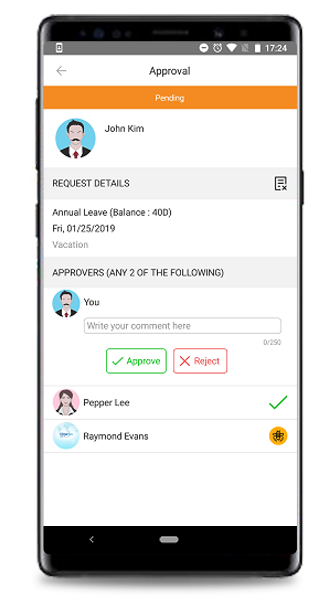
| ii. 2nd Approver View (i.e. Christopher Evans) 1st Approver has approved the application. |
 |
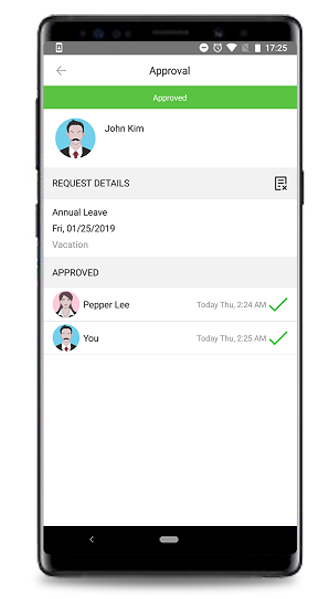
| 1st & 2nd Approver have approved the application. |
 |
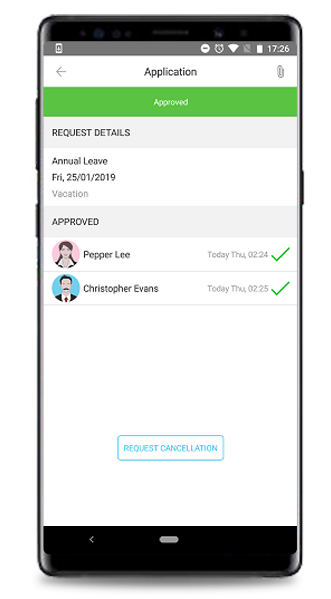
| b. User View Approved Leave Application |
 |
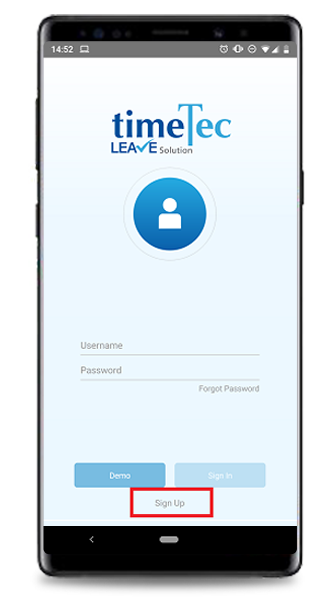
| 2. Sign In New Sign In UI, with link for Sign Up. New App Installation: Link for Sign Up |
 |
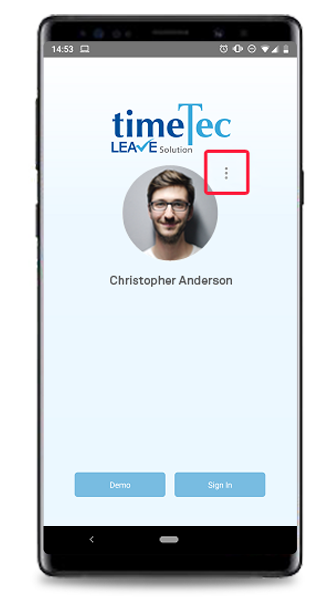
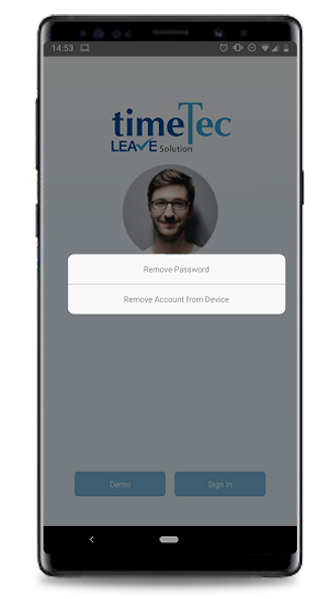
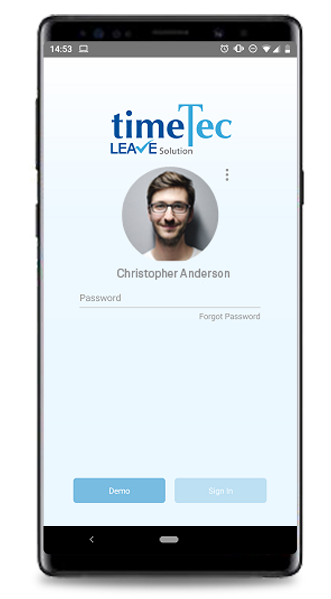
| Existing User: Remove saved Password |
   |
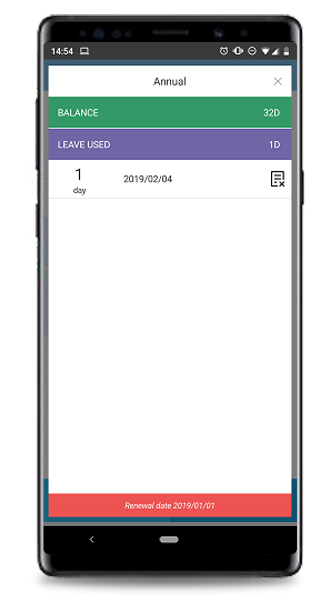
| 3. Home Added Leave Renewal Date indication. |
 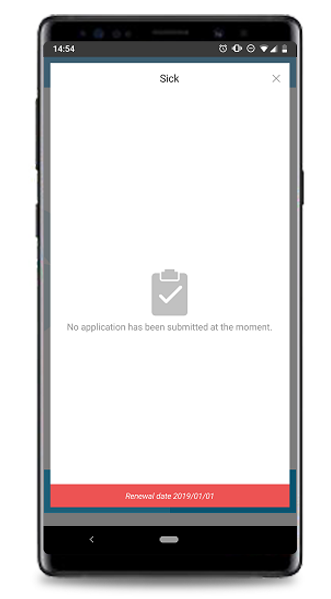 |
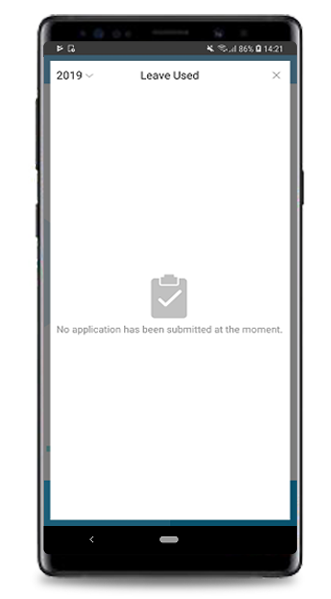
| Allow to access ‘Leave Used’ pop-up even when application is empty. |
 |
| Previous Issue: January 2019 • December 2018 • November 2018 |
| Note: If some of the screenshots or steps viewed here are different from the ones in the current system, this is due to our continuous effort to improve our system from time to time. Please notify us at info@timeteccloud.com, we will update it as soon as possible. |